In this part of the chapter you will learn how to break into encrypted file-hosted volumes. You will find out how law enforcement agencies, special services and hackers do it. You will learn about the proven method of getting access to encrypted storages known as rubber-hose cryptanalysis and state-of-the-art techniques such as RAM forensic analysis.
To guard against having your encrypted file-hosted volume compromised, you need to take comprehensive prevention measures by adhering to the rules of encrypted file-hosted volume safe use. This part will focus on the first five of them.
Be aware that though an encrypted file-hosted volume, given you are using both a strong password and keyfile, will prove almost impossible to defeat to all malicious intruders, this is applicable only to dismounted encrypted file-hosted volumes. In the event of a mounted encrypted file-hosted volume, there is direct access to all the files inside it. If at this moment someone gets access to your computer, he will get access to all the files of the mounted encrypted file-hosted volume. However, there is a way out of every attack. You can protect yourself even from rubber-hose cryptanalysis, and you are going to learn how to do it as you move through the course.
Secret 1. Protect your encrypted file-hosted volumes from antiviruses.
You must have heard about the fallout between Kaspersky Lab and the U.S. National Security Agency. The confrontation resulted in a devastating blow to users’ trust in Kaspersky Lab’s products and turning away from using them not only in the U.S. but in other countries as well.
A Kaspersky antivirus was installed on a user’s personal computer who was recruited by NSA (some argue that the user was an NSA contractor). The antivirus found suspicious files identified as classified information on the user’s machine files and uploaded them to Kaspersky Lab for analysis. This was confirmed by Eugene Kaspersky, the company’s founder and chief executive, but the unknowns remain. According to NSA, the secret files were passed on to Russian intelligence agencies while Kaspersky Lab’s statement says that the copy of the source code that was taken from the user’s machine was destroyed.
Most antiviruses are capable of sending any suspicious file, document or application from a computer to the servers of the product maker. This is a required measure to protect users and detect new threats. If you have an encrypted file-hosted volume on your machine, after it mounts, your antivirus will scan it and can send any file it will consider as malicious to the servers for analysts. Protecting yourself from this kind of threat is an important part of ensuring your work with encrypted file containers is secured.
There a lot of options to handle this issue. First, not all antiviruses index mounted encrypted file containers, sometimes it is possible to restrict their activity in the settings. Second, some antiviruses allow you to restrict sending files to the servers (for instance, if you have a Kaspersky product installed – by disabling KSN). Third, some antiviruses send only certain types of data, for instance, Windows Defender sends executable files but doesn’t send documents, images and other files. In some cases you are better-off without antivirus.
In this chapter I can’t give you a targeted solution for this problem since it depends a lot on the antivirus you are dealing with and how sensitive your data is, but I will revisit this topic in the chapter that focuses on antiviruses.
Tip
Secure the contents of your encrypted file-hosted volumes from antivirus.Secret 2. Clean Data about open files and documents.
You have probably seen that Microsoft Word stores information about the names of open documents, similar to Pages in macOS and other word processor applications. Media players store names of videos, image view applications – names of images.
It is possible to get access to this data even when an encrypted file-hosted volume is unmounted, forensic software operates in a similar manner. When you work with a document, stick to the following simple advice: create names for your files that don’t give up its contents, at least for your most sensitive documents.
Tip
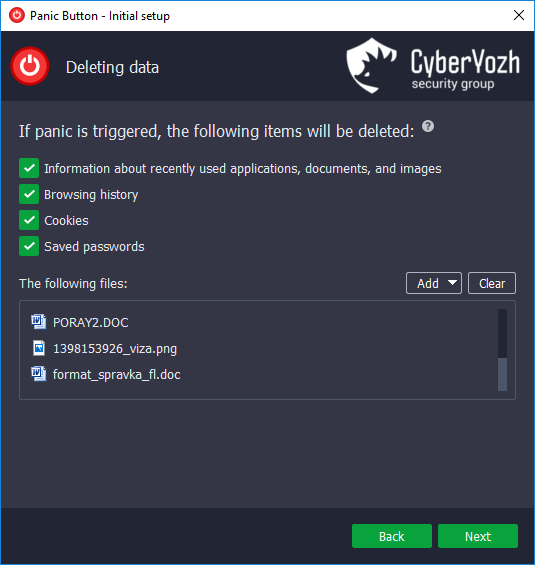
The names of your sensitive documents shouldn’t reveal their contents and importance.We have an entire section explaining how to work with documents safely, where you will find out about metadata, macro commands and the information that gets saved to your computer when a document opens. You can use the application Panic Button to instantly destroy any data about viewed documents. To perform this, in the settings of the data to be deleted, tick the checkbox with the deletion of information about viewed documents. When the application is activated, the information about all viewed Microsoft Office and WordPad documents will be erased.
Tip
Clear the information about viewed documents, especially if you care about the safety of your sensitive files.Your system also keeps the thumbnails of viewed images. An unwitting user who didn’t know that the thumbnails of all opened images are saved in unencrypted state and can be viewed by a computer expert was jailed on child pornography charges for storing all compromising materials in his encrypted file containers. The thumbnails were instrumental in building an evidence base and putting him behind bars.
While a popular Russian computer forensics textbook gives an example of how thumbnails were used to expose money forgers.
You can see the thumbnails saved to your computer by navigating the following path %userprofile%\AppData\Local\Microsoft\Windows\Explorer (Windows 7, 8, 10).
How do you solve this problem? You can just delete thumbnails or better do it using a shredder as common deletion always allows a user to restore them. Don’t forget about backup copies where deleted thumbnails can be stored, make sure to disable Windows shadow copies.
For emergency data erasure, use Panic Button. In the “Deleting data” options, select the item “Information about recently used applications, documents, and images”. When Panic Button is activated, it will remove the information about the images you have viewed.
Tip
Clear information about viewed images.Windows has an option that allows you to entirely disable thumbnail creation – you will find out about it in the chapter that focuses on protective measures from forensic analysis. However, that won’t solve the problem of the names of viewed images getting saved to your computer.
Secret 3. Minimum required rights.
There is one invariable IT security rule you should stick to at all times: never grant more rights than needed. Or: always grant only the minimum required rights.
When you come to a museum, you are forbidden to touch displayed works, only some staff has these rights. You can watch, listen, discuss them as these are the minimum rights you need. By granting you the right to touch objects, the museum will expose its property to unjustified risks. Now you are getting the hang of it. Let’s see how this analogy applies to encrypted file-hosted volumes TrueCryptandVeraCrypt.
Do you always change files in a mounted encrypted file-hosted volume? Sometimes you need to mount an encrypted file-hosted volume only to see some sensitive information or show it to someone. Why in this case would you want to give the system the rights to edit or remove data?
Mount volume as read-only, the option of mounting an encrypted file-hosted volume only for reading, solves this problem. You mount your encrypted file-hosted volume, access its files, but you can’t make any changes to the contents of the encrypted file-hosted volume.
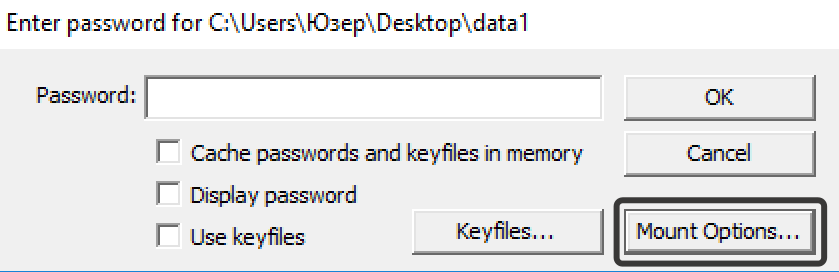
How do you mount your encrypted file-hosted volume as read-only? Start mounting an encrypted file-hosted volume, when you proceed to enter a password for the volume, select Mount Optionsin VeraCrypt or Options if you are using TrueCrypt.
Select the option Mount volume as read-onlyand press OK.
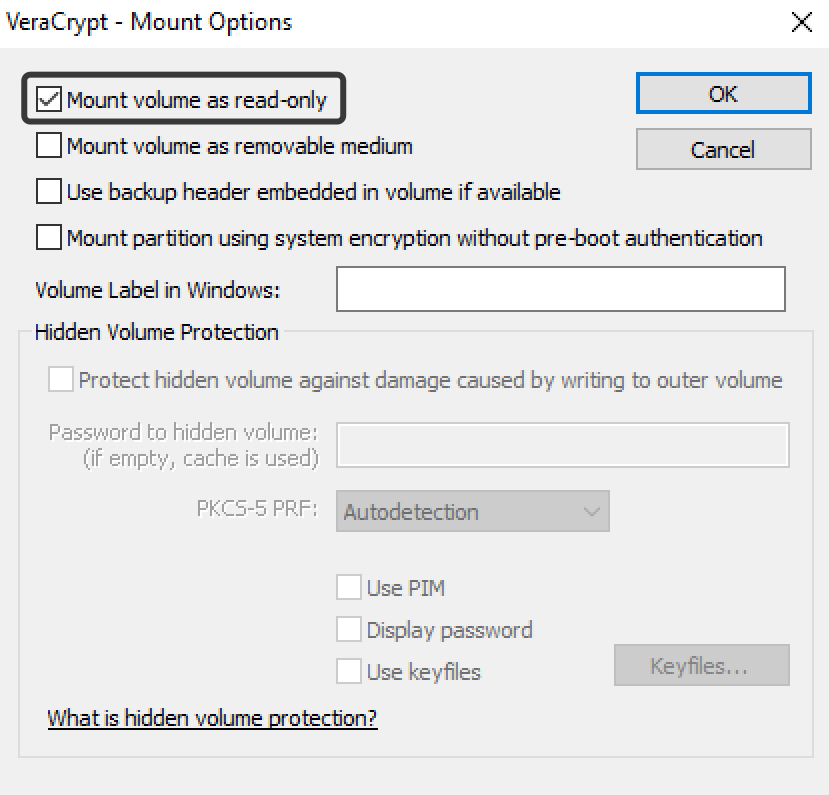
Now enter a password, specify keyfile if you are using it and mount an encrypted file-hosted volume as read-only.
Tip
Never grant applications more rights than you actually need. If your application needs only to read a file, don’t give it the right to edit or remove this file.Secret 4. Use hot keys.
Encrypted file-hosted volume securely protects access to your confidential information when it is dismounted. Given you use both a strong password and keyfile, getting access to your files with technical means becomes a practically insurmountable task. But a mounted encrypted file-hosted volume doesn’t have any more protection than a common folder.
In an emergency situation you may need to dismount all mounted encrypted file-hosted volumes as fast as possible. So how do you do it in this case? The best solution here is to set up in advance a hot-key combination. Unfortunately, this option is available only for TrueCrypt’s and VeraCrypt’s users running the operating system Windows.
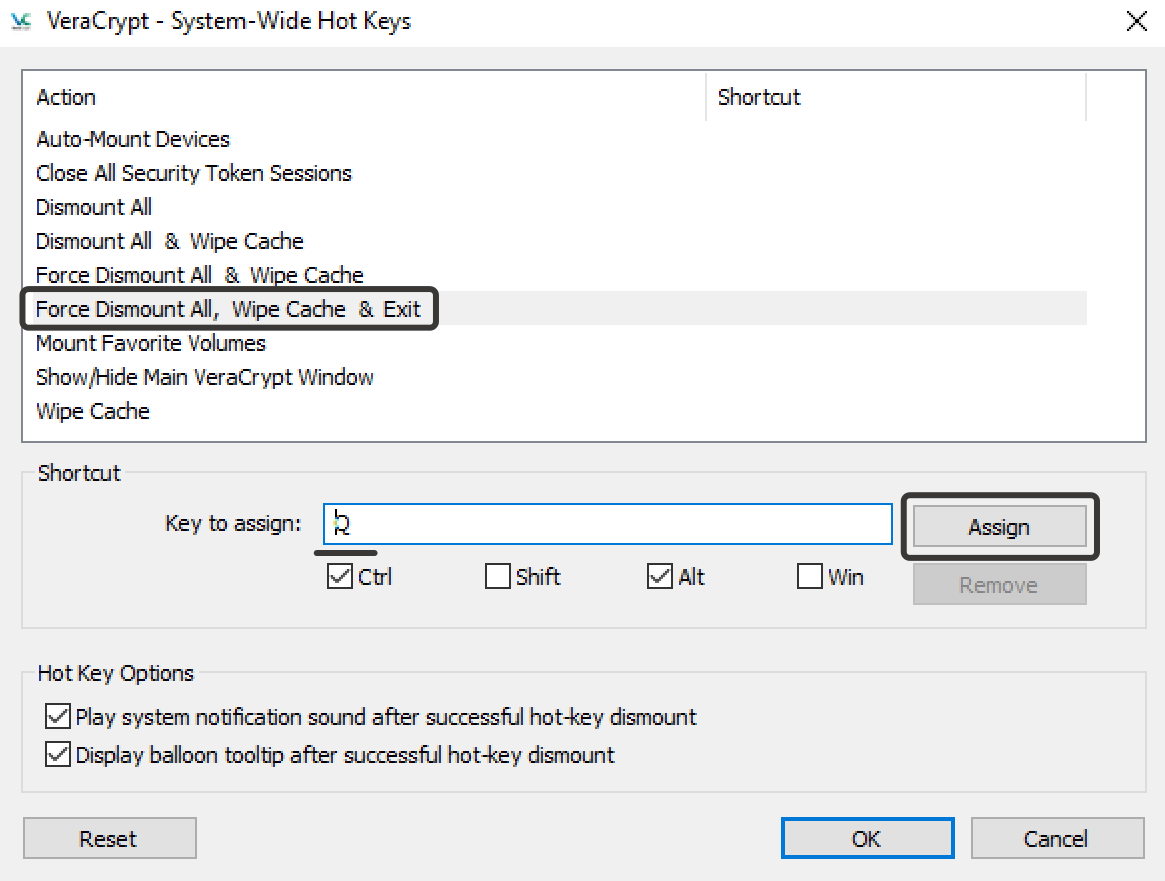
Open VeraCrypt or TrueCrypt. Select Settings>HotKeys…
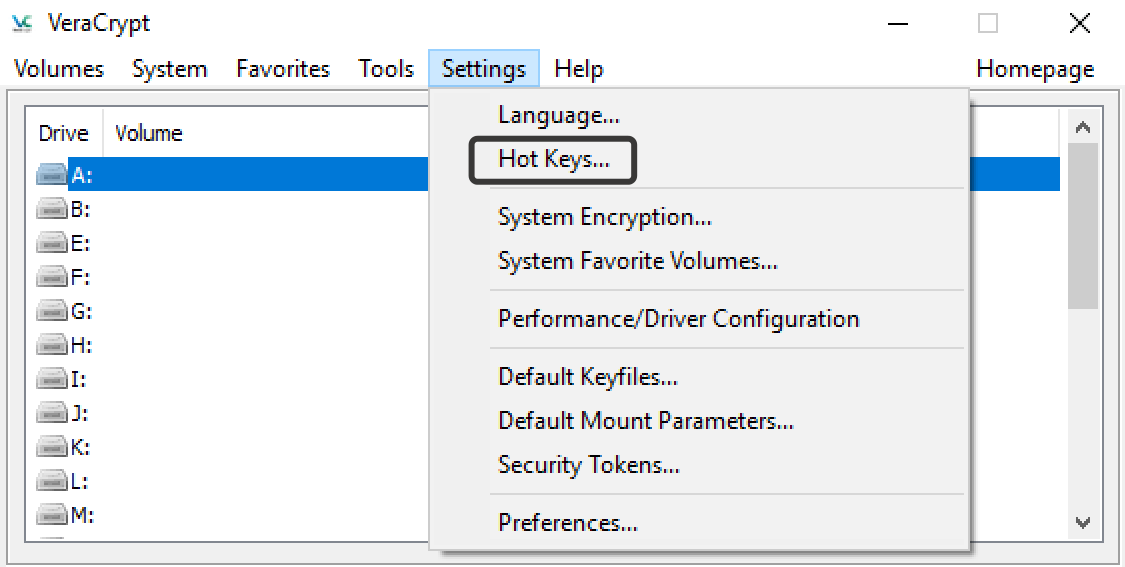
First, select the list of actions that will be performed when the hot keys are activated. We recommend you to choose Force Dismount All, Wipe Cache & Exit.Then select a combination of keys that will trigger the already chosen actions. Specify any letter that will be part of the combination and press Assign.
What is password cache and why do you need to wipe it? When you are working with an encrypted file-hosted volume, encrypting and decrypting files, the information is coded with encryption key. This encryption key must be stored somewhere before your encrypted file-hosted volume is dismounted. The cache of the key for encryption and decryption is stored in RAM. Encrypted file-hosted volume dismounting must always include cache wipe, this is set up in TrueCrypt’s and VeraCrypt settings by default.
If the encryption key is not removed, it can be extracted, and your data – defeated with the help of special computer forensic tools. When you select the actions, we strongly recommend you to choose Wipe Cache.
When you finish creating your hot-key combination, it will be seen the list. Press OK. Now mount an encrypted file-hosted volume and press the selected combination. The application must dismount your volume, wipe cache and exit.
Secret 5. Never leave the encrypted file-hosted volumes you are not using in a mounted state.
This may sound like a tip for a simpleton, but believe me, the majority of users overlook it when they switch to using encrypted file-hosted volumes on a regular basis.
You must develop a habit: if you stopped using a mounted encrypted file-hosted volume, immediately dismount it. Do it at once, even if you have enabled the option of auto-dismounting encrypted file-hosted volume in a certain period of time, do not rely on it. This habit must be taken to a hard-wired automatic reflex.
Tip
Dismount your encrypted file-hosted volume as soon as you finish using it.If you have left your workstation, all your encrypted file-hosted volumes must be left dismounted. This is extraordinarily obvious, still everyone forgets about it pretty quickly.
Tip
Dismount all your encrypted file-hosted volumes when you leave your computer.It is easy to learn how to use encrypted file-hosted volumes and make them part of your daily routine. However, learning how to safely work with them requires consistent effort. Now that you have made the first steps, proceed to find out more in the next articles.