Prior in this chapter we have already shown you how to install TrueCrypt and VeraCrypt and compared the advantages and disadvantages of each program. In this section we will walk you through the steps to ensure you can create and use encrypted file-hosted volumes with the help of TrueCrypt and VeraCrypt on-the-fly encryption software.
The key functionality and appearance of these applications are identical, so we are going to show how they work by guiding you through the windows version of VeraCrypt running it on a Windows 10 machine. This instruction is helpful for users of any of the two programs launched in any operating system,
Creating an encrypted file-hosted volume in TrueCrypt / VeraCrypt
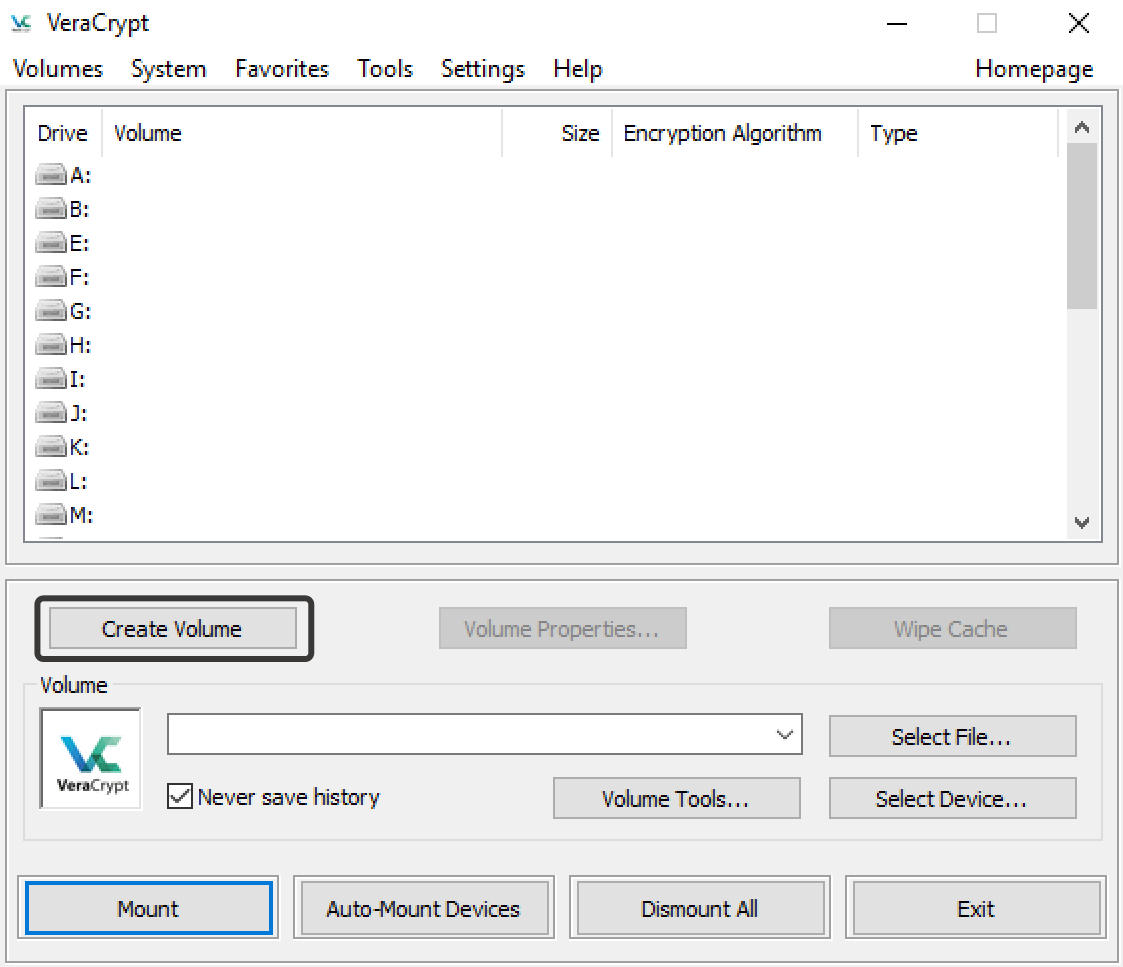
Let’s start by creating a volume. Run VeraCrypt / TrueCrypt and in the main screen click on the “Create Volume” button.
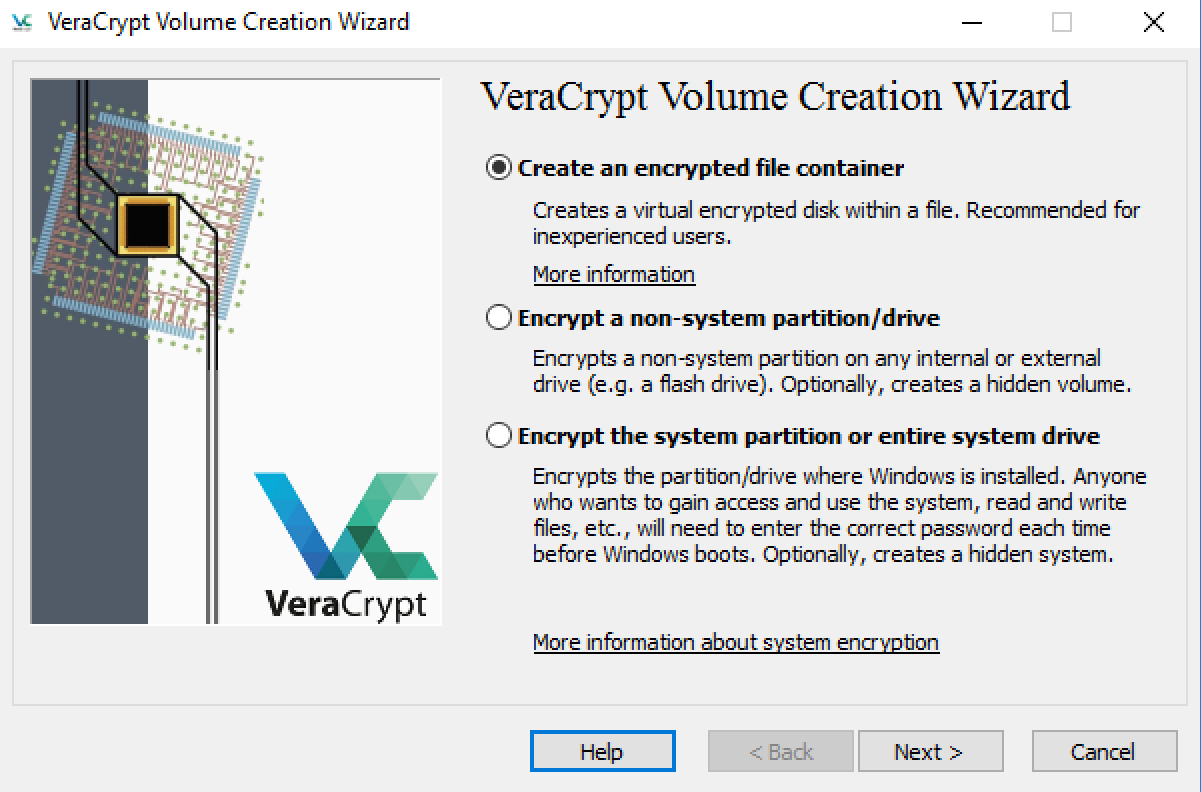
This will launch the VeraCrypt Volume Creation Wizard that will prompt you to select one of the three options.
Create an encrypted file container – create a common encrypted file-hosted volume. That’s what we are going for.
Encrypt a non-system partition/drive – encrypt a non-system partition on a hard drive, USB flash drive or SD card.
Encrypt the system partition or entire system drive – encrypt a drive where the operating system is installed or create an additional system drive. If you choose this option, you will need to enter the password every time the operating system boots up, and you will learn about it in one of the next sections of the chapters.
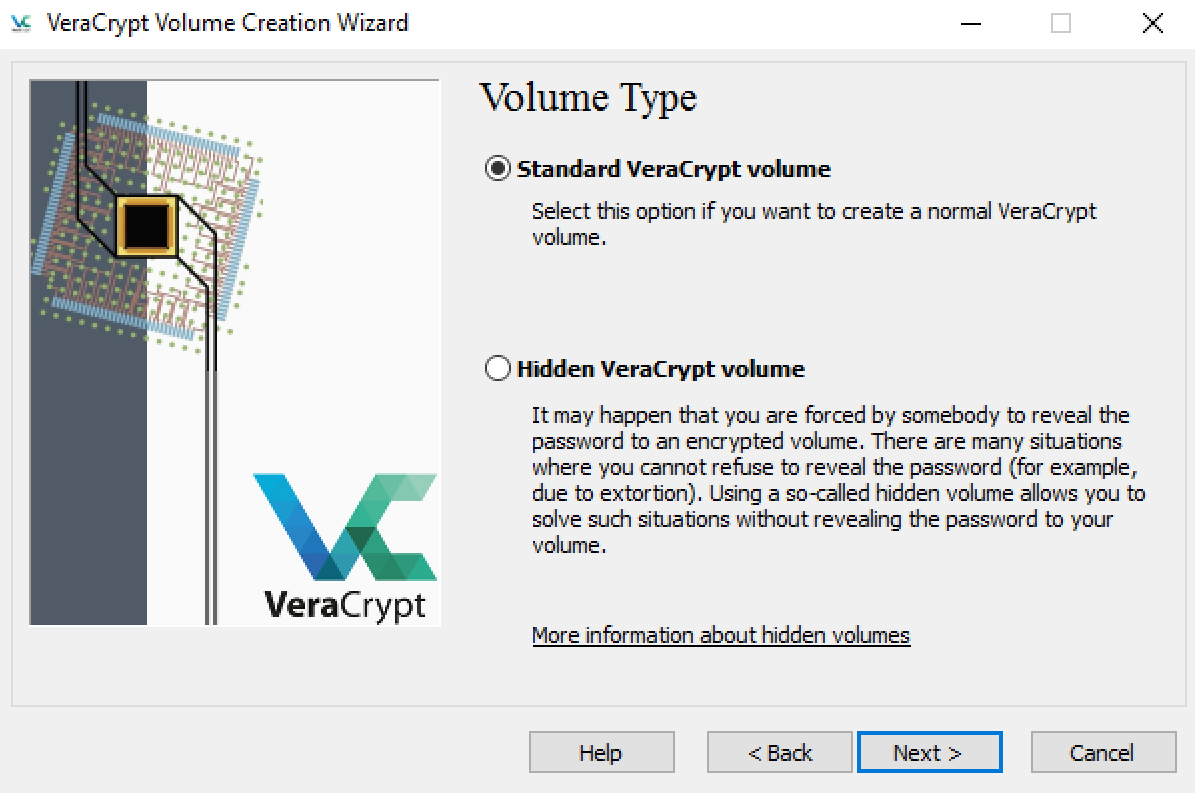
On the next screen, you have to select the type of the volume you wish to create: standard or hidden. In this course you will learn how to create hidden encrypted file-hosted volumes. But for now select the first option - Standard VeraCrypt volume.
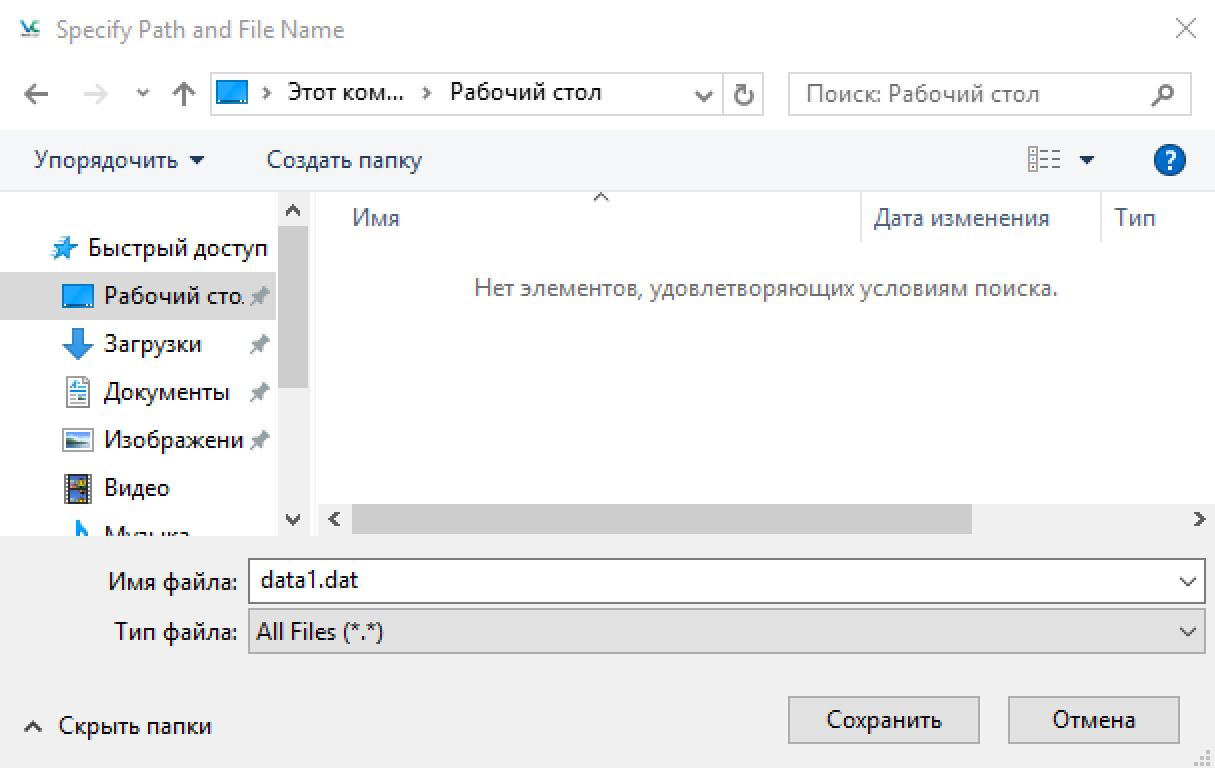
The Wizard will ask you to select the location for your file, name and file extension.
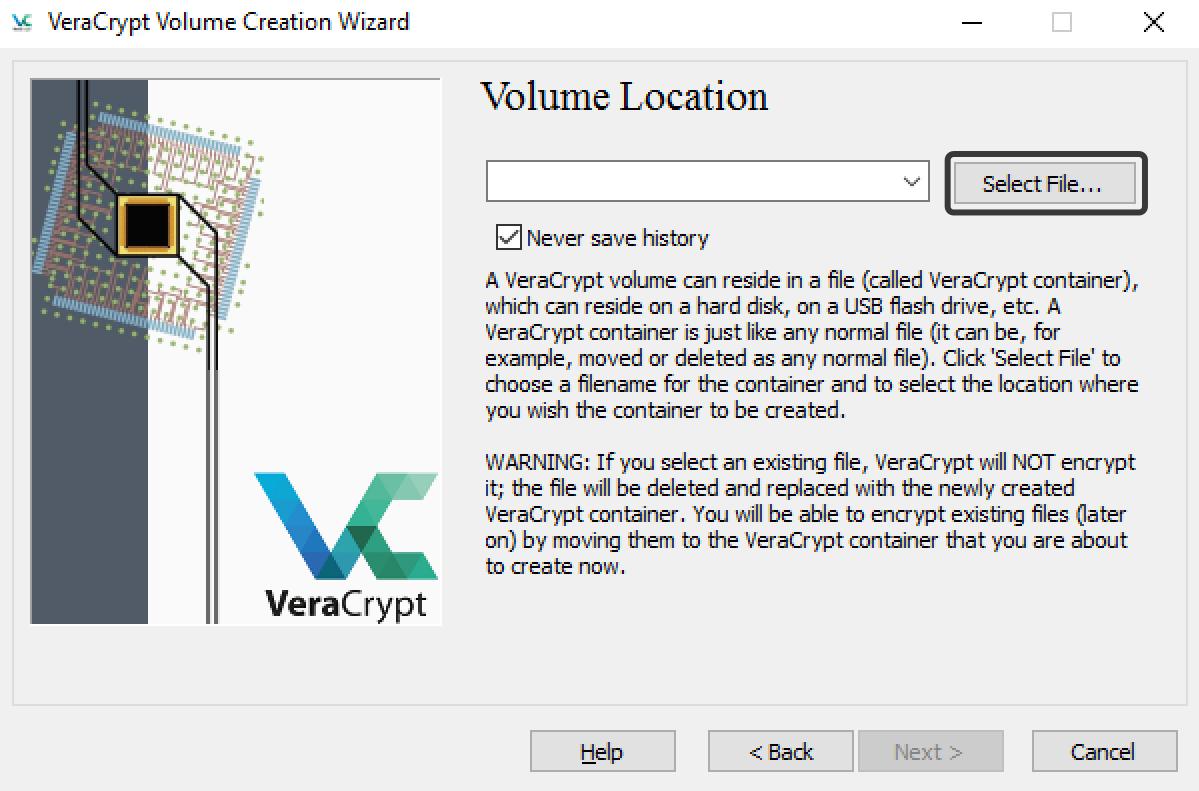
You can choose any extension and location for the file you wish to save, however we don’t recommend choosing a name that doesn’t differ from existing files.
Below on the screenshot you can see that we have chosen the name data1.dat for our encrypted file-hosted volume and saved it to the “Desktop” folder.
Do you know why we created a file with the extension .dat? This is an important detail you can read about in the chapter exploring TrueCrypt.
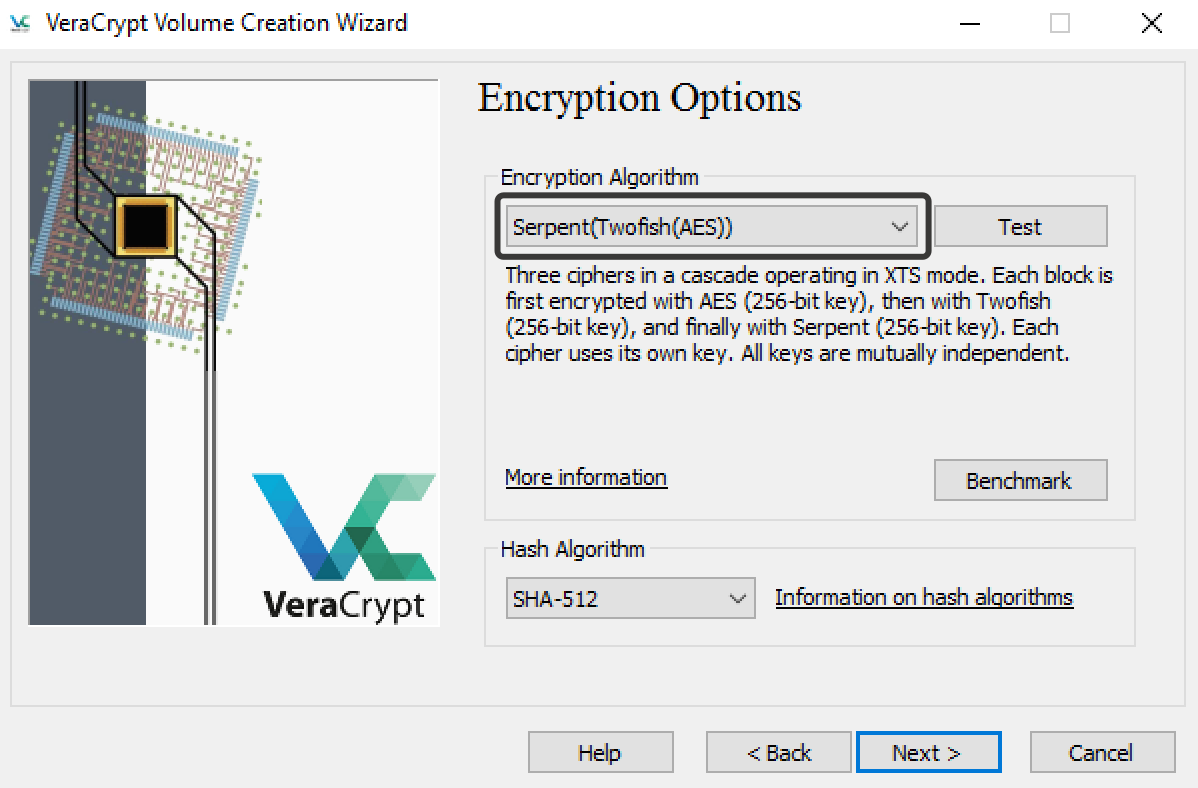
Next, you will need to choose an encryption option. An encryption option is a method used for encrypting your data.We would delve into comparing the encryption schemes, but it would be tiring and tedious, so you won’t go wrong if you choose Serpent-Twofish-AES.
Next, the system will ask you to choose the volume size for your encrypted file-hosted volume. When creating a volume, be aware to allocate 5% (but not over 100 MB) of its size for system information and the key for data decryption.
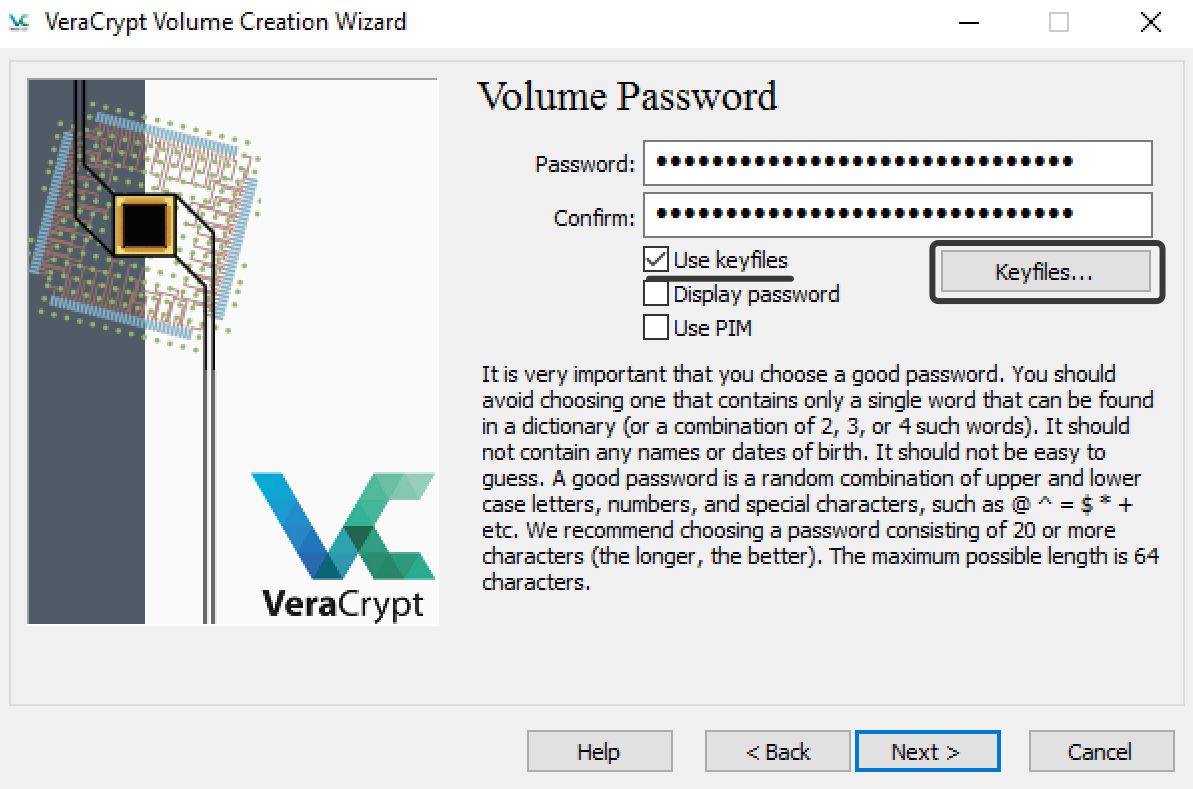
After you choose the volume size, we need to generate a password for decrypting your volume. We strongly recommend you use both password and keyfile to ensure maximum security. To do so, check the box Use keyfiles.
Before creating a password and keyfile, we suggest you read this chapter. To add a key, click on the Keyfiles button.
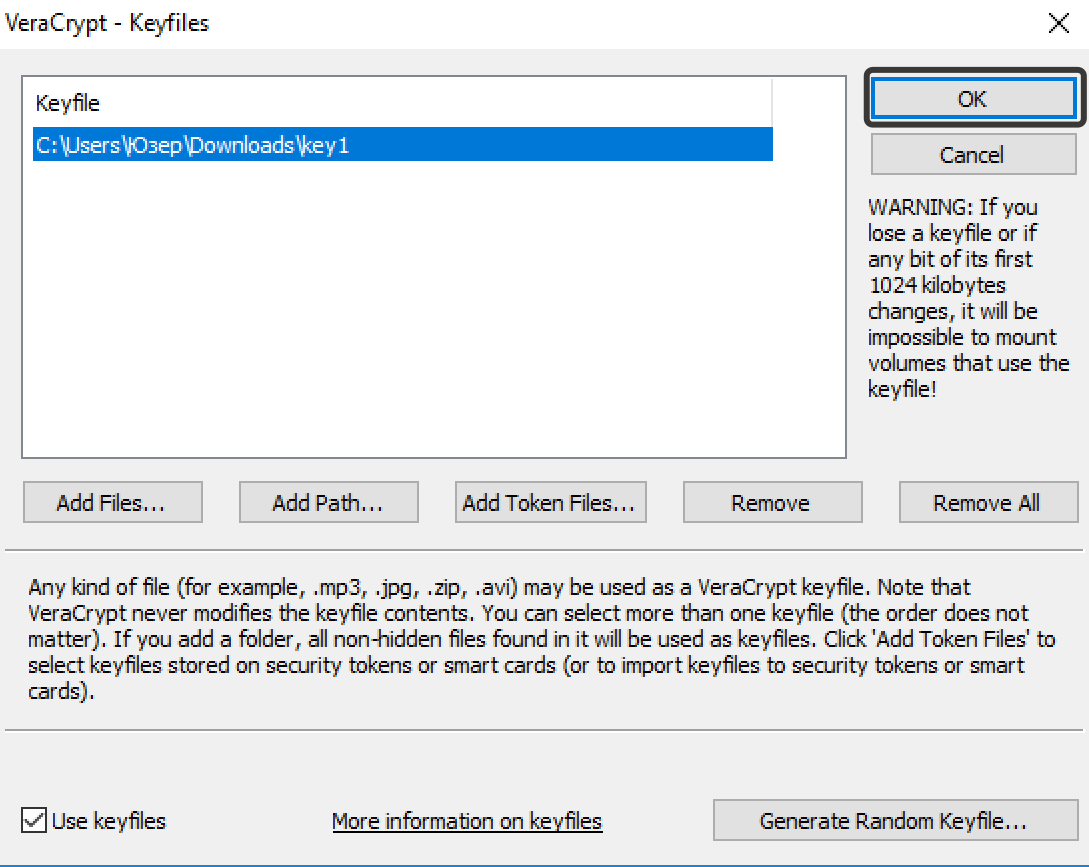
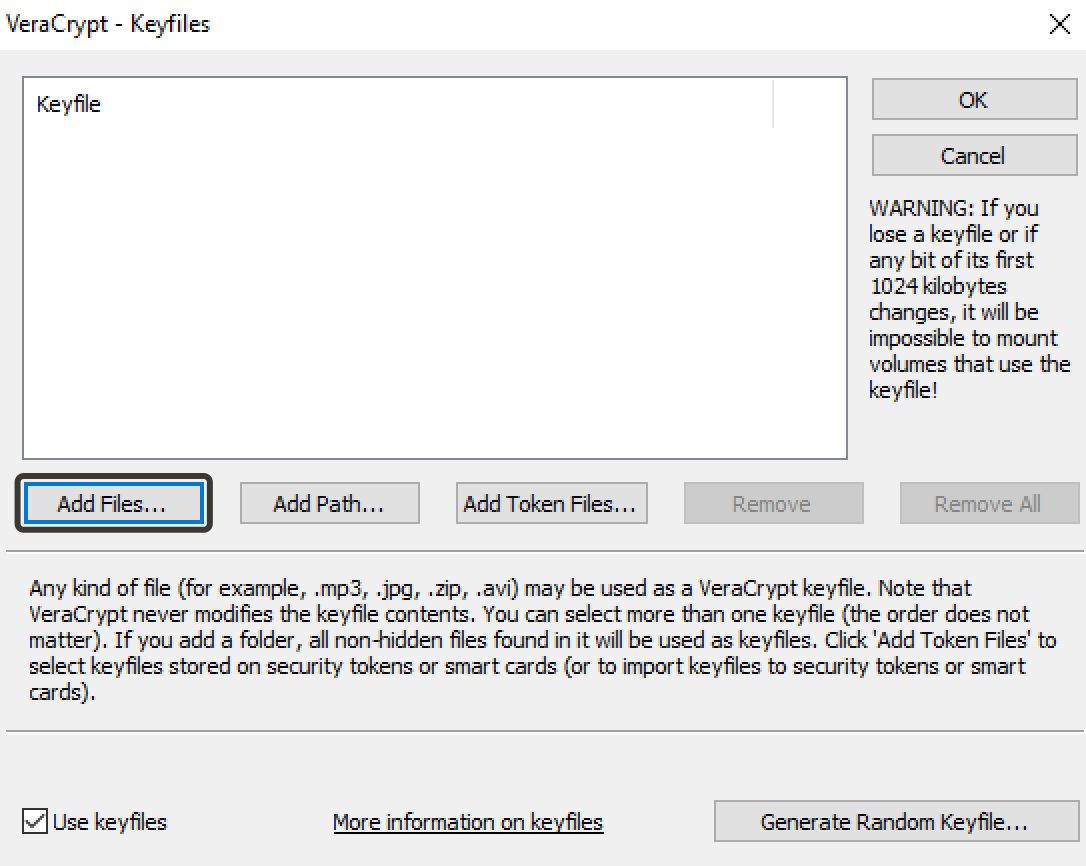
In the window that appears, choose Add Files if you want to add your file as a key or Generate Random Keyfile if you want to create keyfile.
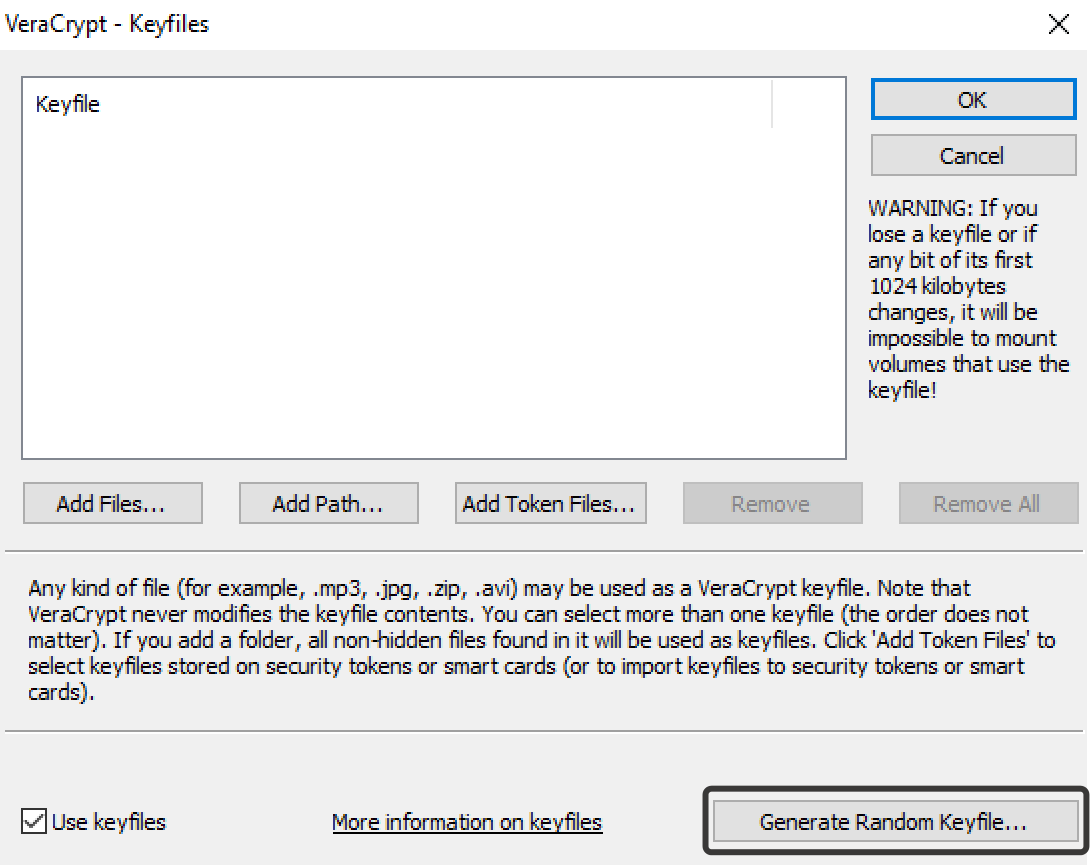
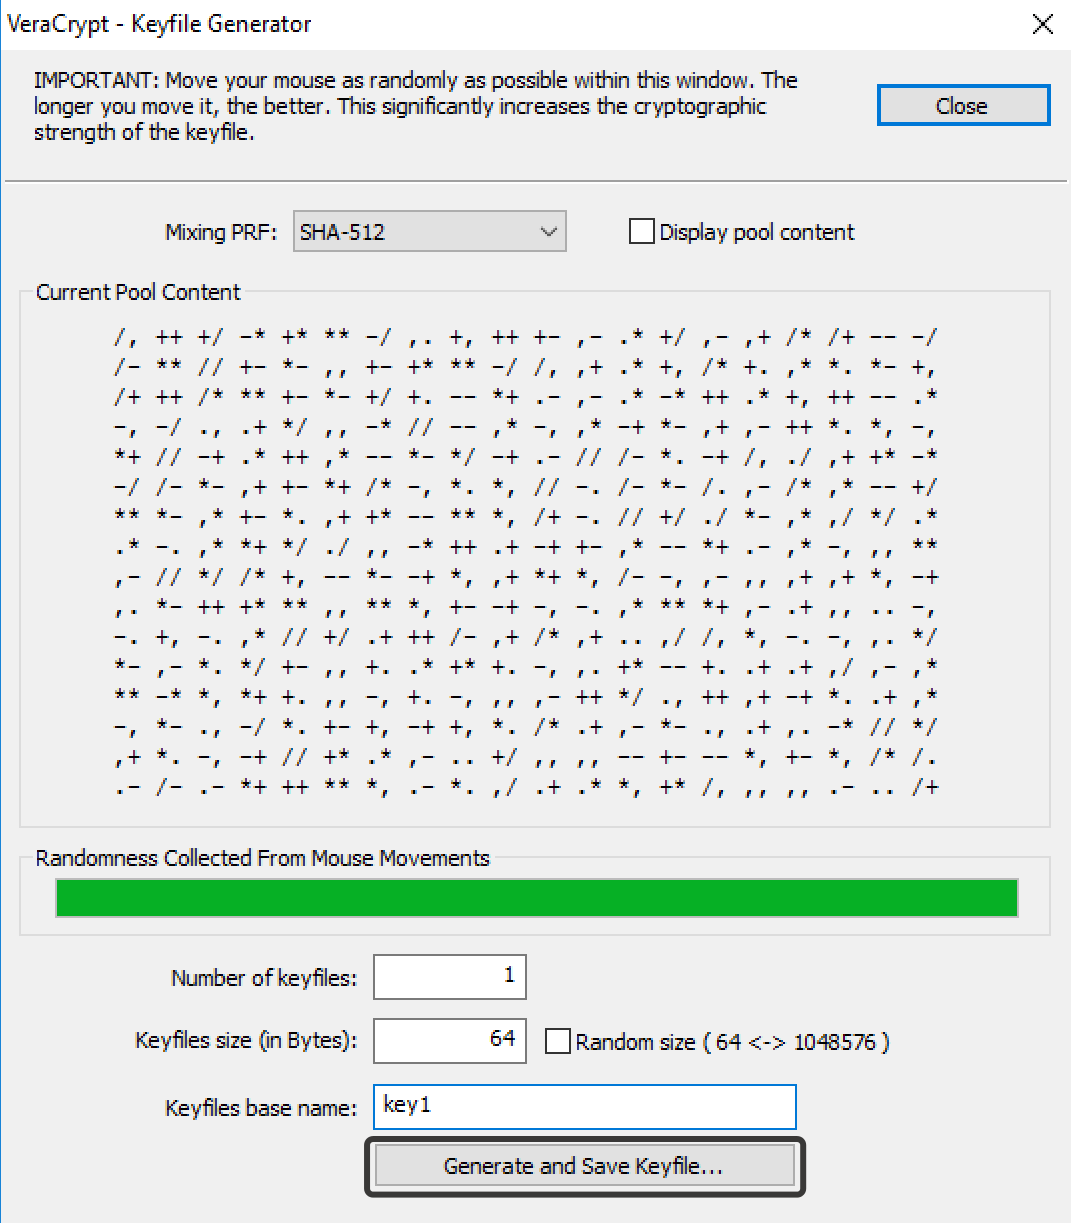
We recommend you generate a new key. Move your mouse cursor around the screen until your key is generated, then choose its name and click Generate and Save Keyfiles. The system will prompt you to specify the location where you want the keyfile you’ve just generated to be saved.
After you create the key, click on Add Files… and add this key to the list of VeraCrypt / TrueCrypt keys. Then select it from the list and click OK.
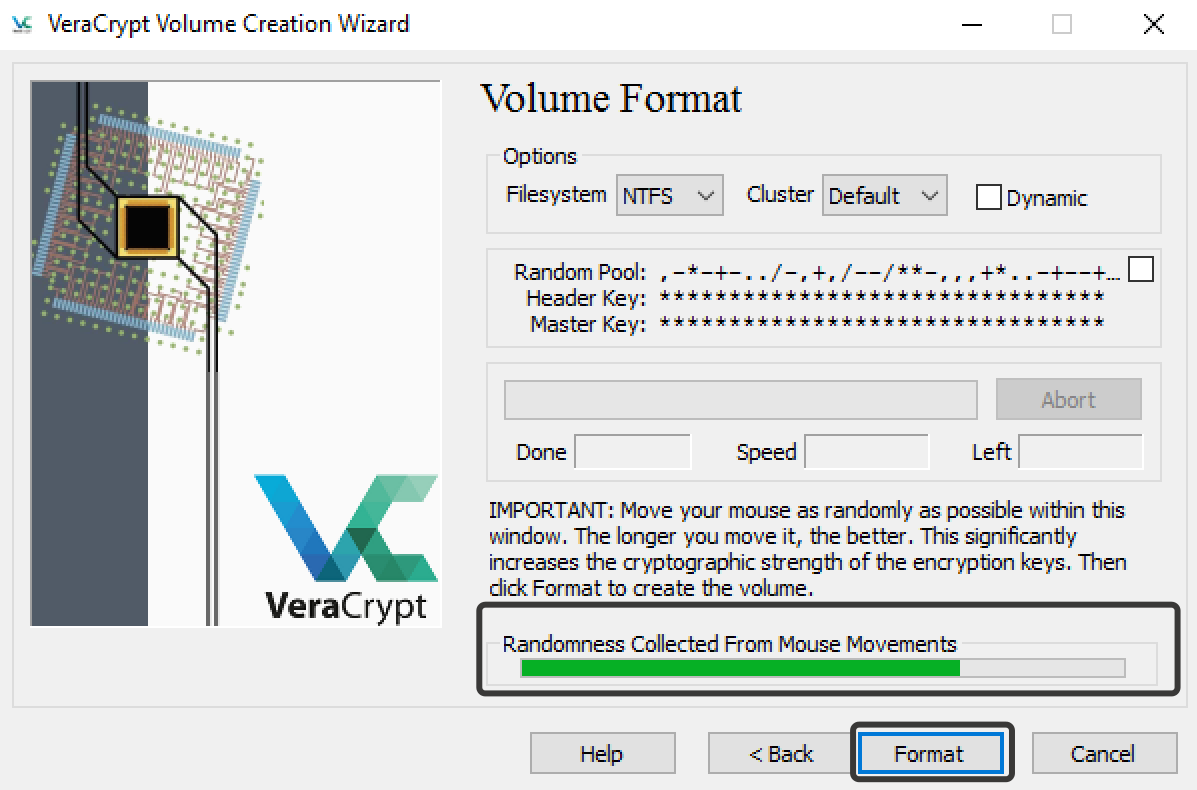
Next, the Wizard will ask you to choose the filesystem. If you are a Windows user, we suggest you go for NTFS. After you select the filesystem for your encrypted file-hosted volume, click Format.
Make sure you sufficiently move your mouse around to increase the security of the volume you’ve just created (though in an indirect way).
The time it takes to create an encrypted file-hosted volume depends on its size and selected encryption algorithms. Once the process is complete, the program will ask you if you wish to create another encrypted volume. Many beginners would worry that this screen shows because the encrypted volume failed to be created. Actually, this is a standard final step indicating the creation of an encrypted file-hosted volume is finished. Simply proceed to close the window and start using the encrypted volume.
Mounting an encrypted file-hosted volume in TrueCrypt / VeraCrypt
Usually, users tend to confuse encrypted volume mounting with data decryption. Mounting describes the process by which the system launches an encrypted file-hosted volume in the application to make the information created in the encrypted volume available for reading, recording and deleting.
Decryption describes the process of merely accessing the encrypted information inside the encrypted file-hosted volume.
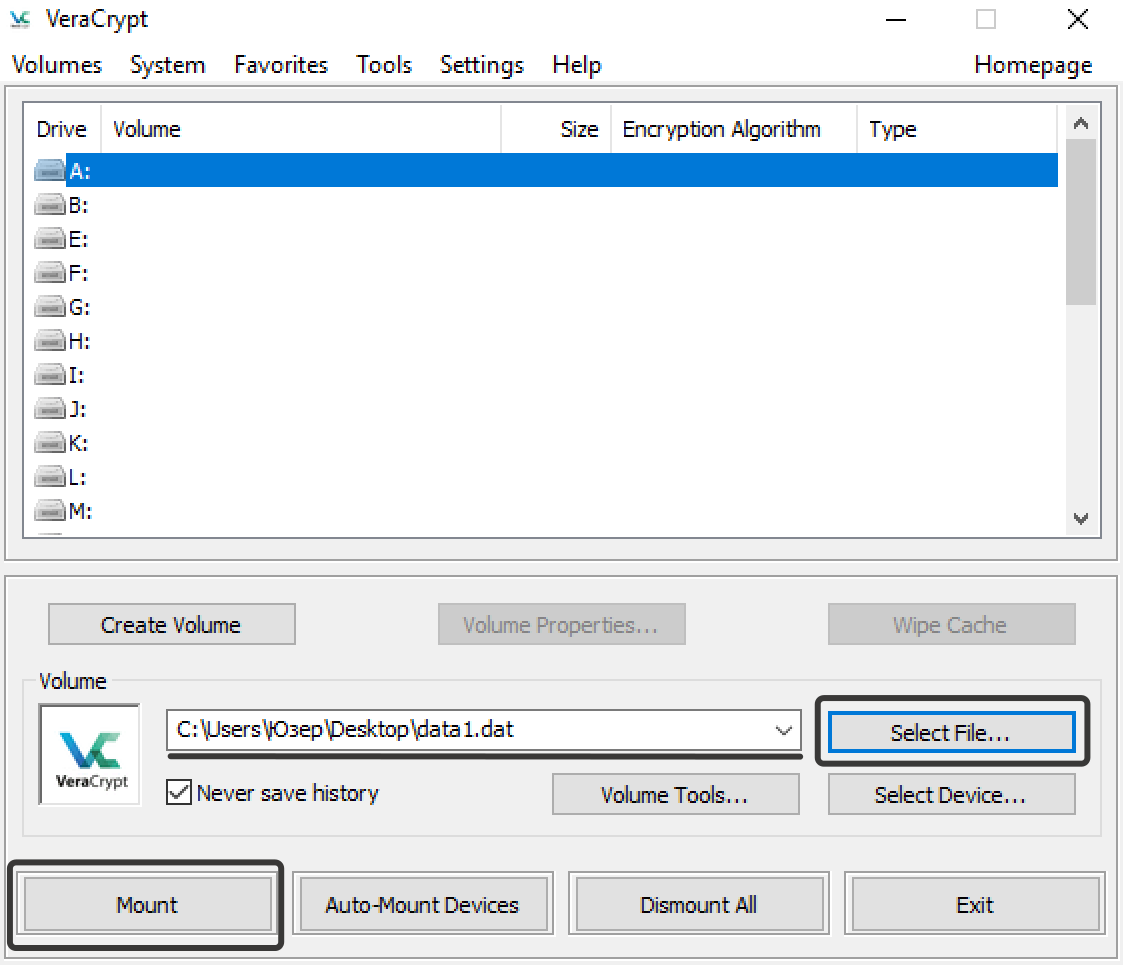
This article shows how to mount encrypted volumes in VeraCrypt and TrueCrypt. These applications can’t boast great usability, so users will be greeted by the screen similar to the one you can see below.
It may look somewhat different, you may see numbers instead of letters, but the proper name for it is Drive List. Just pick any available letter/number and click on the Select File button. Select the encrypted volume you’ve created before and click Open.
Now mount the encrypted file-hosted volume by clicking on the Mount button.
To mount an encrypted file-hosted volume, enter the correct password. If you used a keyfile, you’ll need to specify its location. To do it, check the box Use keyfiles and click on the Keyfiles button.
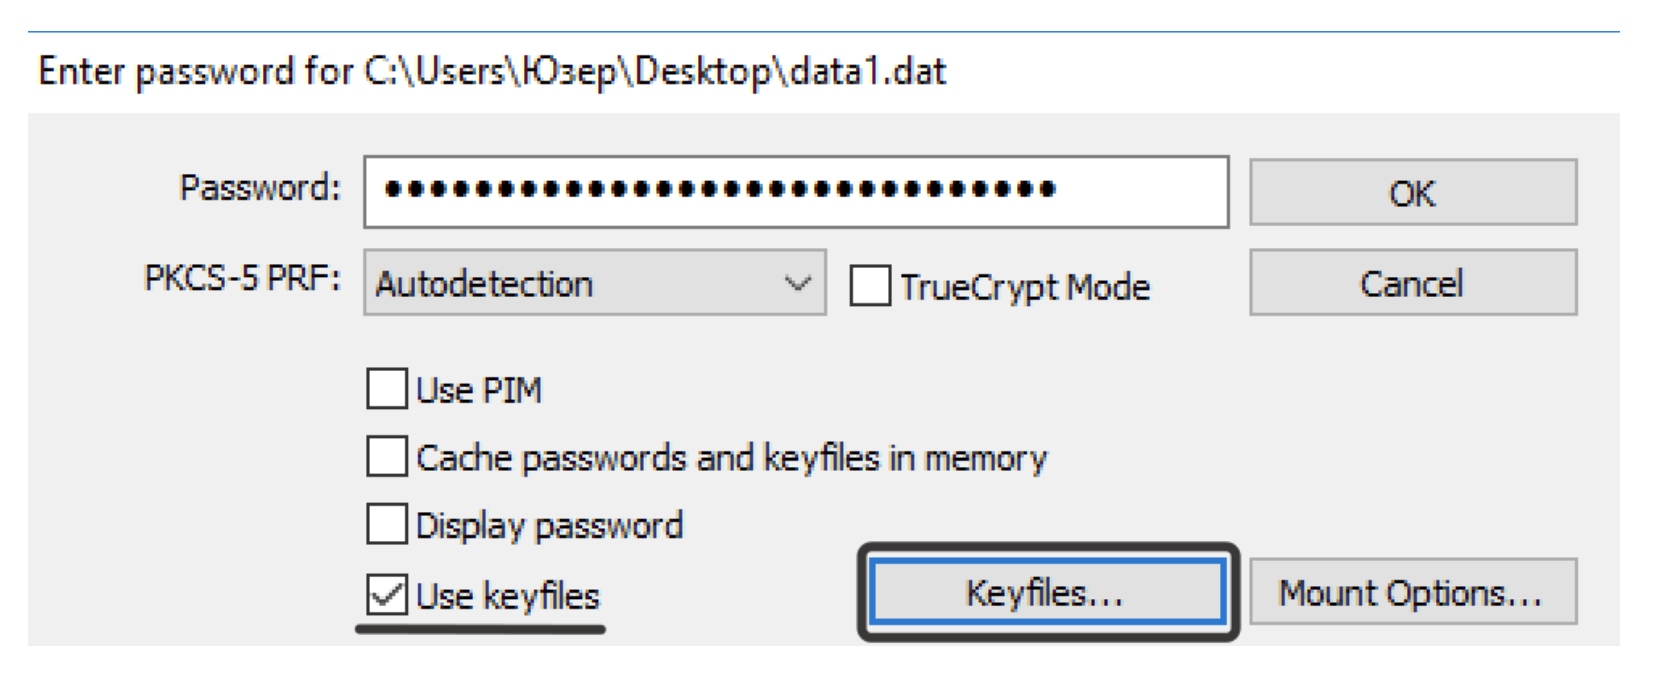
This will launch a window with keyfiles. If it contains no key, add it by clicking Add files, then choose the keyfile from the list and click OK.
If the password and key are entered correctly, the encrypted volume will appear in the list of mounted drives. Double-click the mounted volume to access its contents.
Using an encrypted file-hosted volume in TrueCrypt / VeraCrypt
We have already created an encrypted volume. An encrypted file-hosted volume is a place where you can store information encrypted. If you used both keyfile and strong password, it will take several hundreds of years to defeat it. You need to get used to keeping all your sensitive information only in encrypted file-hosted volumes.
If you are running the program on a Windows machine, you will see the mounted volume as the local disk. If you are using macOS, you’ll see the mounted encrypted volume in the devices list in Finder.
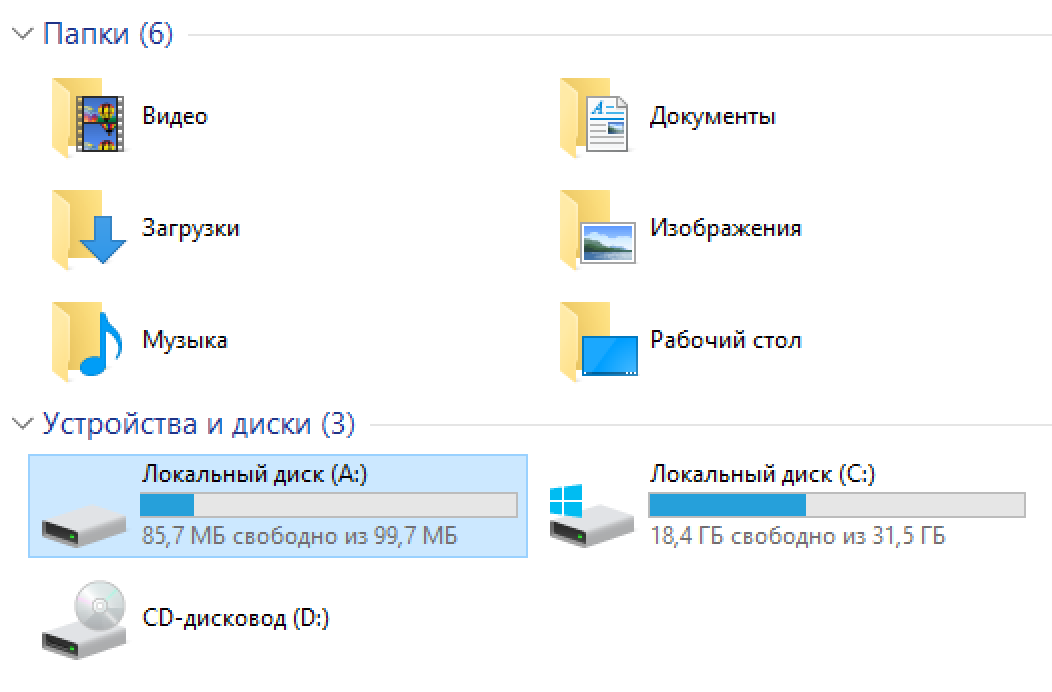
You can use the mounted volume as a common disk: save, edit, delete information, relocate and archive files, create folders.
Dismounting encrypted file-hosted volumes in TrueCrypt / VeraCrypt
When you dismount an encrypted file-hosted volume, you stop working with an encrypted storage. Just open the application, select the mounted encrypted volume and click on the Dismount button.
After reading this guide, many readers will be tempted to quit this course and immediately start using encrypted file-hosted volumes. Don’t be in such a hurry! You still have to learn important information to safely use encrypted volumes. We will focus on it in the nextchapter.
Tip
Don’t be in such a haste to start using encrypted volumes and quit this course until you set up comprehensive security for your PC.We know at least 5 ways to access the contents of your encrypted file-hosted volume, and we will reveal all of them in this course.